How to Create macOS Sonoma Bootable USB
The following is a guide for creating macOS Sonoma Bootable USB. The installation has been covered in another section. You can use this USB for a clean install of macOS Sonoma on your compatible Mac.
Before you start with this guide, here are a few requirements
STEP 1: Accessing macOS Developer Beta Access Utility
The very first step is to download macOS Sonoma. A copy of macOS is currently available to developers who have enrolled in the Apple Developer Program. If you have still not enrolled in the program, there's still a way to it which has been referenced below.
 elitemacx86.com
To download macOS Sonoma, follow the steps below
1. If you're using macOS Mojave or later, you can obtain macOS Sonoma via your developer account. Sign-in to your Apple Developer Account
2. From the left pane, click on Downloads
3. Scroll down and under Overview, select macOS.
4. Under macOS Beta Software, use the link to download macOS Developer Beta Access Utility.
STEP 2: Installing macOS Developer Beta Access Utility
The next step is to install macOS Developer Beta Access Utility which will provide an update for macOS Monterey. To install the Developer Access Utility, follow the steps below.
1. Open the macOSDeveloperBetaAccessUtility.dmg using double click which you downloaded in step #2.
2. Install the package file. When prompted, enter your password and proceed with the installation.
STEP 3: Download macOS Sonoma
After installing the macOS Developer Beta Access Utility, an update will be detected in System Preferences>Software Update.
1. Click on the Upgrade Now button and the software update will start downloading the copy of macOS Sonoma.
View attachment 4343
STEP 4: Creating a Bootable USB Flash Drive with Createinstallmedia
The next step is to create a bootable installation drive. Follow the steps below to create the installation media.
1. Insert your USB Flash Drive
2. Open Disk Utility. The Disk Utility is located at
3. Click on View and then select Show All Devices

4. Select your USB Flash Drive in the left pane and click on Erase button. At the top and a popup will appear. Use the following parameters to erase your drive.
Name: USB
Format: Mac OS Extended (Journaled)
Scheme: GUID Partition Map

NOTE:
Do NOT use any other format other than Mac OS Extended (Journaled) to erase the USB.
5. When done, click on Done and close Disk Utility. You can click on Show Details to verify if the USB has been erased with HFS+ format.

6. Launch Terminal, located at
7. Execute the createinstallmedia command given below in Terminal.
8. When prompted, enter your password.

9. Press (Y) to confirm and then press enter key. It will start erasing the disk and will create macOS Bootable USB


If you're on Big Sur or later, the Terminal may prompt for access. When prompted, click on OK to allow access.

Once the process is completed, you'll see the following screen:

10. Quit Terminal. The USB Flash Drive will be renamed as Install macOS 14 beta.
Now you can use this Bootable USB to perform a clean install of macOS Sonoma on your Mac!
QUICK NOTE:
If you're looking for a clean installation guide, you can follow the guide below.

 elitemacx86.com
The following is a guide for creating macOS Sonoma Bootable USB. The installation has been covered in another section. You can use this USB for a clean install of macOS Sonoma on your compatible Mac.
Before you start with this guide, here are a few requirements
- A working Internet connection.
- A 16 GB or larger USB Flash Drive.
- A complete backup of your system.
STEP 1: Accessing macOS Developer Beta Access Utility
The very first step is to download macOS Sonoma. A copy of macOS is currently available to developers who have enrolled in the Apple Developer Program. If you have still not enrolled in the program, there's still a way to it which has been referenced below.

GUIDE - How to Download macOS Sonoma without Developer Account
How to Download macOS Sonoma without Developer Account Today, Apple announced their new macOS lineup i.e macOS Sonoma 14.0. A copy of macOS Sonoma is currently available to developers who have enrolled in the Apple Developer Program. Users who have not enrolled in Apple's Developer Program...
 elitemacx86.com
To download macOS Sonoma, follow the steps below
1. If you're using macOS Mojave or later, you can obtain macOS Sonoma via your developer account. Sign-in to your Apple Developer Account
2. From the left pane, click on Downloads
3. Scroll down and under Overview, select macOS.
4. Under macOS Beta Software, use the link to download macOS Developer Beta Access Utility.
STEP 2: Installing macOS Developer Beta Access Utility
The next step is to install macOS Developer Beta Access Utility which will provide an update for macOS Monterey. To install the Developer Access Utility, follow the steps below.
1. Open the macOSDeveloperBetaAccessUtility.dmg using double click which you downloaded in step #2.
2. Install the package file. When prompted, enter your password and proceed with the installation.
STEP 3: Download macOS Sonoma
After installing the macOS Developer Beta Access Utility, an update will be detected in System Preferences>Software Update.
1. Click on the Upgrade Now button and the software update will start downloading the copy of macOS Sonoma.
View attachment 4343
STEP 4: Creating a Bootable USB Flash Drive with Createinstallmedia
The next step is to create a bootable installation drive. Follow the steps below to create the installation media.
1. Insert your USB Flash Drive
2. Open Disk Utility. The Disk Utility is located at
/Applications/Utilities.3. Click on View and then select Show All Devices
4. Select your USB Flash Drive in the left pane and click on Erase button. At the top and a popup will appear. Use the following parameters to erase your drive.
Name: USB
Format: Mac OS Extended (Journaled)
Scheme: GUID Partition Map
NOTE:
Do NOT use any other format other than Mac OS Extended (Journaled) to erase the USB.
5. When done, click on Done and close Disk Utility. You can click on Show Details to verify if the USB has been erased with HFS+ format.
6. Launch Terminal, located at
/Applications/Utilities.7. Execute the createinstallmedia command given below in Terminal.
Code:
#Beta 1:
sudo /Applications/Install\ macOS\ 14\ beta.app/Contents/Resources/createinstallmedia --volume /Volumes/USB

#Beta 2:
sudo /Applications/Install\ macOS\ Sonoma\ beta.app/Contents/Resources/createinstallmedia -- volume /Volumes/USB
8. When prompted, enter your password.
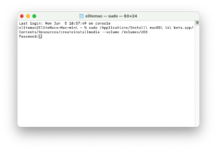
9. Press (Y) to confirm and then press enter key. It will start erasing the disk and will create macOS Bootable USB
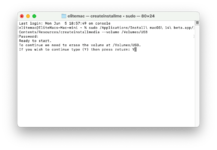
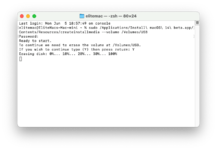
If you're on Big Sur or later, the Terminal may prompt for access. When prompted, click on OK to allow access.
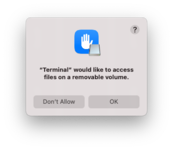
Once the process is completed, you'll see the following screen:
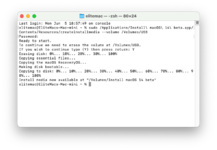
10. Quit Terminal. The USB Flash Drive will be renamed as Install macOS 14 beta.
Now you can use this Bootable USB to perform a clean install of macOS Sonoma on your Mac!
QUICK NOTE:
- macOS Sonoma Installer must exist in the Applications folder.
- createinstallmedia is supported by OS X Mavericks and newer only.
If you're looking for a clean installation guide, you can follow the guide below.

GUIDE - How to Clean Install macOS Ventura on your Mac
How to Install macOS Ventura on your Mac The following is a guide for installing macOS Ventura on your Mac. You can use this guide for a clean install of macOS Ventura on your compatible Mac. Overview Today, Apple announced their new macOS lineup i.e macOS Ventura 13.0 which is Apple's...
 elitemacx86.com
Last edited:
