How to Install macOS Sonoma on PC [Intel/AMD]
The following guide is a complete installation guide for installing a fresh copy of macOS Sonoma on PC. The post-installation has been covered in another section. The required tools and downloads are available at the forum.

Apple announced its new macOS version i.e. macOS Sonoma (14.0) at WWDC23, which is the next major revision to its Operating System in the Macintosh lineup. As usual, a Developer Preview version will be available immediately for Developers who are enrolled in the developer program, and a Public Beta which is expected in July, coming this fall.
Although, macOS Sonoma is still in the beta phase, existing users running macOS Ventura or prior who wish to try out macOS Sonoma, can either upgrade or perform a clean installation on their systems. Please be advised that due to being in the beta phase, it may contain several bugs and that is why it is not recommended to use it as a daily driver. As this is a clean install guide, this method involves bootable USB creation and you'll not be able to preserve any files or system settings. Therefore, it is highly recommended to back up your files before proceeding. In addition, if you have a secondary system, it would be best to use that for trying out macOS Sonoma Beta. In case you do not have one, a spare drive will do the job. This is because on the new beta OS, it might be possible that there are potential bugs that can hamper your daily workflow on the system and unlike Windows, there is no rolling back while keeping your files and system settings.
If you plan to perform an upgrade, follow the guide linked below

 elitemacx86.com
Requirements
Before you start with this guide, here are a few requirements
To start with the guide, you'll also need to have access to a fully functional computer running macOS Mojave or later. This requirement is must as you need to access to Mac App Store in order to download a copy of macOS and create an installation USB Flash Drive later on.
STEP 1: Back up your System
Before you proceed with the installation, we strongly recommend performing a full backup of your existing installation using Carbon Copy Cloner or Time Machine, or any other reliable backup/restore tool. In case the installation fails or you encounter any issues with the installation, you can always restore the system to its previous state using the backup you created.
STEP 2: Download macOS Sonoma
As macOS Sonoma is not officially released for the general public, but only for developers, you would need an Apple Developer Account along with the Software Enrollment to download a copy of macOS Sonoma. However, if you've not enrolled, you can download an official copy of macOS Sonoma directly from Apple Server using the guide linked below.

 elitemacx86.com
If you want to download a DMG file, refer to the guide linked below.

 elitemacx86.com
STEP 3: Create macOS Sonoma Bootable USB
Once you have obtained macOS Sonoma Installer, the next step is to create macOS Bootable USB. To create macOS Sonoma Bootable USB, refer to the guide linked below.

 elitemacx86.com
NOTE: The Bootable USB Creation guide involves preparing EFI and installing OpenCore to USB. If you have already followed the Bootable USB Creation guide, you shouldn't require STEPS #4 and #5. However, if you haven't or anyhow missed it, follow the steps accordingly.
STEP 4: Preparing OpenCore EFI
The next step is to prepare OpenCore EFI for booting the installer. Depending on your system, create the OpenCore EFI using the guide linked below. See Chapter 3.

 elitemacx86.com
Once you're done with the EFI, you'll need to adjust some parameters which are required for booting macOS Ventura.
NOTES:
STEP 5: Install OpenCore to Bootable USB
Once your EFI is ready, the next step is to install OpenCore EFI to Bootable USB. See Chapter

 elitemacx86.com
STEP 6: Setup BIOS/UEFI
Before you rush and try to boot using the USB Installer, you should set up your BIOS/UEFI first. To set up your BIOS, refer to the guide linked below

 elitemacx86.com
STEP 7: Boot the macOS Installer
After preparing your installation USB, EFI and setting up your BIOS/UEFI, you're ready to install it on your target PC.
1. Turn on your target System.
2. Boot to Boot Menu.
3. Select your USB Flash Drive with the UEFI Prefix and press enter to boot.
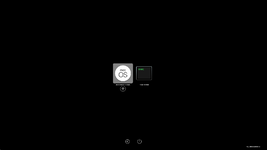
4. When at the OC Boot picker, select Install macOS 14 beta and press enter to boot. The installer will load in a while. If you have an existing version of macOS, the drive may appear in the OpenCore Boot picker.


STEP 8: Installing macOS Sonoma
1. When at the installation screen, select your preferred language and continue
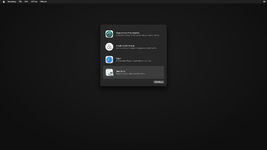
2. Select Disk Utility and click on Continue

3. When at Disk Utility, Click on View, and then select Show all Devices.


4. Now select the Hard Drive or SSD on which you want to install macOS and click on Erase button. Use the following parameters to erase your drive.
Name: Macintosh HD
Format: APFS
Scheme: GUID Partition Map

5. Once the parameter is set, click on Erase button and the disk will be erased.
6. After easing the disk, click on Done and close Disk Utility. You can click on Show Details to verify if the USB has been erased with APFS format.


NOTE: You must erase the whole target disk instead of any partition.
7. Select Install macOS 14 beta and click on Continue and then continue with the options.


8. Now select Macintosh HD and click on Continue.

Now, macOS Sonoma will begin installing to your selected disk.

Here it ends the first phase of the installation.
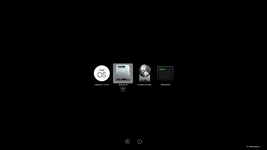
9. When your PC restarts, it will automatically boot from macOS Installer to continue the next phase of the installation. If for any reason, the installer does not auto boot, select macOS Installer in the boot picker and then boot. The installation will continue and upon completion, your PC will automatically restart.


10. Once again, your PC will restart. Upon restarting, it will automatically boot from macOS Installer to continue the installation. If for any reason, the installer does not auto boot, select macOS Installer in the boot picker and then boot. The installation will continue and upon completion, your PC will automatically restart.


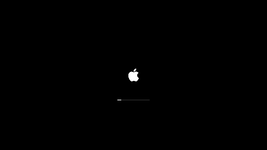
Once again, your PC will restart, and when your PC restarts, it will automatically boot from Macintosh HD to continue the last phase of the installation. You'll see something as shown below.


STEP 9: Finishing macOS Setup
After finishing the macOS installation, it's time to set up the macOS for the first usage with the newly installed macOS.
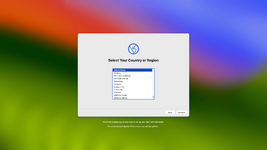
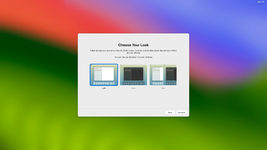
When you're at the welcome screen, continue to set up with the basics options such as Keyboard setup, Network, Computer Account, and Privacy settings by following onscreen instructions.


Now the installation is complete!
Enjoy macOS Sonoma on your PC


 elitemacx86.com

 elitemacx86.com
The following guide is a complete installation guide for installing a fresh copy of macOS Sonoma on PC. The post-installation has been covered in another section. The required tools and downloads are available at the forum.
Overview
Apple announced its new macOS version i.e. macOS Sonoma (14.0) at WWDC23, which is the next major revision to its Operating System in the Macintosh lineup. As usual, a Developer Preview version will be available immediately for Developers who are enrolled in the developer program, and a Public Beta which is expected in July, coming this fall.
Although, macOS Sonoma is still in the beta phase, existing users running macOS Ventura or prior who wish to try out macOS Sonoma, can either upgrade or perform a clean installation on their systems. Please be advised that due to being in the beta phase, it may contain several bugs and that is why it is not recommended to use it as a daily driver. As this is a clean install guide, this method involves bootable USB creation and you'll not be able to preserve any files or system settings. Therefore, it is highly recommended to back up your files before proceeding. In addition, if you have a secondary system, it would be best to use that for trying out macOS Sonoma Beta. In case you do not have one, a spare drive will do the job. This is because on the new beta OS, it might be possible that there are potential bugs that can hamper your daily workflow on the system and unlike Windows, there is no rolling back while keeping your files and system settings.
If you plan to perform an upgrade, follow the guide linked below

GUIDE - How to Upgrade to macOS Sonoma on PC [Intel/AMD]
How to Upgrade to macOS Sonoma on PC [Intel/AMD] This guide describes how to upgrade directly to macOS Sonoma on Intel or AMD PC using Clover and OpenCore. By following this guide, you'll be able to upgrade an existing system running any macOS version provided that the hardware you have is...
 elitemacx86.com
Requirements
Before you start with this guide, here are a few requirements
- A compatible Hardware
- A compatible HDD or SSD (NVMe/PCIe/SATA SSD) for installation.
- A working Internet connection.
- A 16 GB or larger USB Flash Drive.
NOTE:
|
To start with the guide, you'll also need to have access to a fully functional computer running macOS Mojave or later. This requirement is must as you need to access to Mac App Store in order to download a copy of macOS and create an installation USB Flash Drive later on.
STEP 1: Back up your System
Before you proceed with the installation, we strongly recommend performing a full backup of your existing installation using Carbon Copy Cloner or Time Machine, or any other reliable backup/restore tool. In case the installation fails or you encounter any issues with the installation, you can always restore the system to its previous state using the backup you created.
STEP 2: Download macOS Sonoma
As macOS Sonoma is not officially released for the general public, but only for developers, you would need an Apple Developer Account along with the Software Enrollment to download a copy of macOS Sonoma. However, if you've not enrolled, you can download an official copy of macOS Sonoma directly from Apple Server using the guide linked below.

GUIDE - How to Download macOS Sonoma without Developer Account
How to Download macOS Sonoma without Developer Account Today, Apple announced their new macOS lineup i.e macOS Sonoma 14.0. A copy of macOS Sonoma is currently available to developers who have enrolled in the Apple Developer Program. Users who have not enrolled in Apple's Developer Program...
 elitemacx86.com
NOTE:
|
If you want to download a DMG file, refer to the guide linked below.

GUIDE - How to Download macOS Sonoma DMG for Clean Install
How to Download macOS Sonoma DMG for Clean Install This guide describes a step-by-step method to download macOS Sonoma DMG for a clean install or upgrade purposes. By following this guide, you'll be able to download macOS Sonoma DMG without a Developer Account and can further use it for...
 elitemacx86.com
STEP 3: Create macOS Sonoma Bootable USB
Once you have obtained macOS Sonoma Installer, the next step is to create macOS Bootable USB. To create macOS Sonoma Bootable USB, refer to the guide linked below.

GUIDE - How to Create macOS Sonoma Bootable USB for PC
How to Create macOS Sonoma Bootable USB for PC The following is a guide for creating macOS Sonoma Bootable USB for your PC. The installation has been covered in another section. You can use this USB for a clean install of macOS Sonoma on your PC. Before you start with this guide, here are a...
 elitemacx86.com
NOTE: The Bootable USB Creation guide involves preparing EFI and installing OpenCore to USB. If you have already followed the Bootable USB Creation guide, you shouldn't require STEPS #4 and #5. However, if you haven't or anyhow missed it, follow the steps accordingly.
STEP 4: Preparing OpenCore EFI
The next step is to prepare OpenCore EFI for booting the installer. Depending on your system, create the OpenCore EFI using the guide linked below. See Chapter 3.

GUIDE - How to Boot macOS Installer on Desktops and Laptops using OpenCore [UEFI/Legacy] - OpenCore Install Guide
How to Boot macOS Installer on Desktops and Laptops using OpenCore [UEFI/Legacy] - OpenCore Install Guide Booting the OS X/macOS installers on a non-Apple computer can be challenging for new users. This guide is intended for those who wish to use OpenCore as a Bootloader and it covers a...
 elitemacx86.com
Once you're done with the EFI, you'll need to adjust some parameters which are required for booting macOS Ventura.
NOTES:
- The bootloader must be the latest. If you're using Clover, (v5152) or later and if you're using OpenCore (v0.9.3) and later is recommended. You can find the pre-built version of OpenCore in the attachment.
- Kexts must be the latest. The essential kexts are Lilu, VirtualSMC, WhateverGreen, and AppleALC. If you're using some other kext and an update is available, you should update that too. If you have used Xcode and know how to build kexts from source, build from the latest commit. Users who are new to Xcode can find the pre-built version of the essential kexts in the attachment. This is mandatory for the installation, ensuring the installer boots successfully and does not run into any problems.
- For AMD Systems, you also need to update the Kernel Patches.
- As Apple has dropped the support for older Mac Models (up to Skylake), you'll need to update the SMBIOS data to 2018 and later. See Setting Up SMBIOS for more information.
STEP 5: Install OpenCore to Bootable USB
Once your EFI is ready, the next step is to install OpenCore EFI to Bootable USB. See Chapter

GUIDE - How to Boot macOS Installer on Desktops and Laptops using OpenCore [UEFI/Legacy] - OpenCore Install Guide
How to Boot macOS Installer on Desktops and Laptops using OpenCore [UEFI/Legacy] - OpenCore Install Guide Booting the OS X/macOS installers on a non-Apple computer can be challenging for new users. This guide is intended for those who wish to use OpenCore as a Bootloader and it covers a...
 elitemacx86.com
STEP 6: Setup BIOS/UEFI
Before you rush and try to boot using the USB Installer, you should set up your BIOS/UEFI first. To set up your BIOS, refer to the guide linked below

BIOS/UEFI Settings for macOS (Intel/AMD)
BIOS/UEFI Settings for macOS (Intel/AMD) Most motherboards will work with only a few changes from Optimized Defaults. However, for some systems, you must change the settings for booting macOS and optimal performance. Before you start making changes to your BIOS, ensure you're running the latest...
 elitemacx86.com
STEP 7: Boot the macOS Installer
After preparing your installation USB, EFI and setting up your BIOS/UEFI, you're ready to install it on your target PC.
1. Turn on your target System.
2. Boot to Boot Menu.
3. Select your USB Flash Drive with the UEFI Prefix and press enter to boot.
4. When at the OC Boot picker, select Install macOS 14 beta and press enter to boot. The installer will load in a while. If you have an existing version of macOS, the drive may appear in the OpenCore Boot picker.
STEP 8: Installing macOS Sonoma
1. When at the installation screen, select your preferred language and continue
2. Select Disk Utility and click on Continue
3. When at Disk Utility, Click on View, and then select Show all Devices.
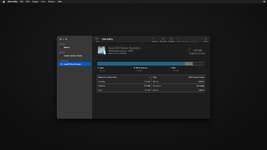
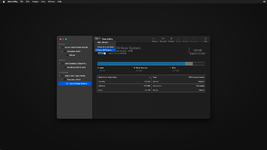
4. Now select the Hard Drive or SSD on which you want to install macOS and click on Erase button. Use the following parameters to erase your drive.
Name: Macintosh HD
Format: APFS
Scheme: GUID Partition Map
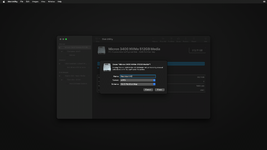
5. Once the parameter is set, click on Erase button and the disk will be erased.
6. After easing the disk, click on Done and close Disk Utility. You can click on Show Details to verify if the USB has been erased with APFS format.
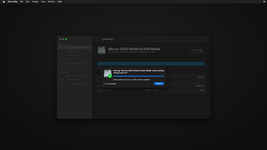
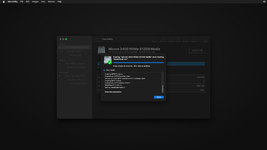
NOTE: You must erase the whole target disk instead of any partition.
7. Select Install macOS 14 beta and click on Continue and then continue with the options.
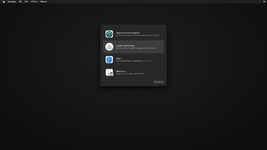
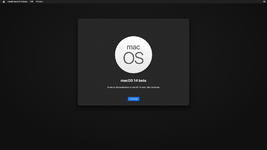
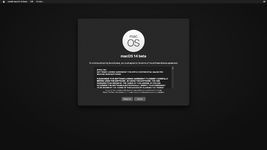
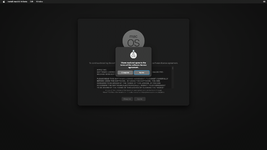
8. Now select Macintosh HD and click on Continue.
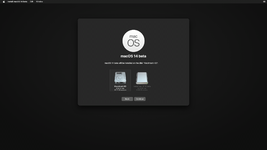
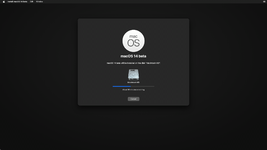
Now, macOS Sonoma will begin installing to your selected disk.
NOTES:
|
Here it ends the first phase of the installation.
9. When your PC restarts, it will automatically boot from macOS Installer to continue the next phase of the installation. If for any reason, the installer does not auto boot, select macOS Installer in the boot picker and then boot. The installation will continue and upon completion, your PC will automatically restart.
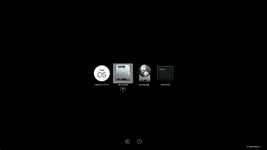
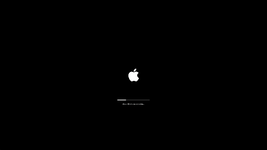
10. Once again, your PC will restart. Upon restarting, it will automatically boot from macOS Installer to continue the installation. If for any reason, the installer does not auto boot, select macOS Installer in the boot picker and then boot. The installation will continue and upon completion, your PC will automatically restart.


Once again, your PC will restart, and when your PC restarts, it will automatically boot from Macintosh HD to continue the last phase of the installation. You'll see something as shown below.

STEP 9: Finishing macOS Setup
After finishing the macOS installation, it's time to set up the macOS for the first usage with the newly installed macOS.
When you're at the welcome screen, continue to set up with the basics options such as Keyboard setup, Network, Computer Account, and Privacy settings by following onscreen instructions.
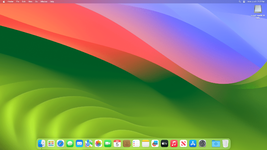
Now the installation is complete!
Enjoy macOS Sonoma on your PC
NOTES:
|
Related:

README - Common Problems in macOS Sonoma (14.0)
Common Problems in macOS Sonoma (14.0) This thread is for common problems in macOS Sonoma. The problems listed here are likely to be experienced by users who attempt to install macOS Sonoma 14.0. This is not a troubleshooting thread. Please do not ask questions regarding your specific issue in...
 elitemacx86.com

macOS Sonoma [Pre-Release]
macOS Sonoma [Pre-Release] Today, at WWDC 2023, Apple announced their new macOS lineup i.e. macOS Sonoma. This thread will be dedicated to discussion regarding the pre-release version discussing the booting, installation, and issues on non-apple computers installing macOS Sonoma. While we...
 elitemacx86.com
Attachments
Last edited:


