- Joined
- Jul 22, 2018
- Messages
- 9,369
- Motherboard
- Supermicro X11SPA-T
- CPU
- Intel Xeon W-3275 28 Core
- Graphics
- 2xAMD RX 580 8GB
- OS X/macOS
- 13.x
- Bootloader
- OpenCore (UEFI)
- Mac
- Mac mini
- MacBook Pro
- Mobile Phone
- Android
- iOS
How to Upgrade your Unsupported Mac to macOS Ventura
An EliteMacx86 Exclusive Guide - This guide covers the upgrade process of macOS Ventura on Unsupported Macs, unofficially.Overview
Today, Apple announced their new macOS lineup i.e macOS Ventura 13.0 which is Apple's newest and most awaited OS. Monterey added massive updates and improvements from its predecessor, Big Sur.
Packed with new features and functionality, the most noticeable update that can be seen and experienced is the new GUI. Featuring a much more "iOS" look and feel and is as smooth as butter. With each release of macOS, Apple removes support for old hardware.
Unfortunately, with the announcement of macOS Ventura, Apple has officially dropped support up to Skylake. Luckily, for our users and readers, we'll provide you with a complete upgrade guide step-by-step.
If you've made an attempt to
install macOS Ventura before reading this guide, you've probably been greeted with the Internet Recovery or no-entry sign immediately after booting from the Ventura installer.
With this in mind, you'll have to use other ways to upgrade your Unsupported Mac to macOS Ventura.
Compatibility
Before you proceed with a clean installation, we suggest you to check the compatibility of the Mac model.
Have another Mac model and want to run macOS Ventura? You can find the complete list of supported Mac models for macOS Ventura and check whether your Mac model is listed. The compatibility list is linked below.

macOS Ventura Compatibility - Can your Mac run it?
macOS Ventura Compatibility List Read the official macOS Ventura System compatibility to confirm whether your current Mac hardware is supported and is capable of running macOS 13. While it's still in Beta, macOS Ventura is coming this fall. Following is the list of compatible Mac models which...
 elitemacx86.com
Requirements
Before you start with this guide, here are the requirements for setting up macOS Ventura on your unsupported Mac mini.
| Mac | Late 2009, Mid 2010, Mid 2011, and Late 2012 |
| Boot ROM Version | Latest Boot ROM installed |
| USB Flash Drive | At least 16GB |
If you meet the above requirements, you're good to go and can start with the guide.
For Clean Install of macOS Ventura on Unsupported Macs

GUIDE - How to Install macOS Ventura on Unsupported Macs
How to Install macOS Ventura on Unsupported Macs An EliteMacx86 Exclusive Guide - This guide covers a clean installation of macOS Ventura on Unsupported Macs, unofficially. Overview Today, Apple announced their new macOS lineup i.e macOS Ventura 13.0 which is Apple's newest and most...
 elitemacx86.com
STEP 1: Create a Backup of your Mac
Before you proceed with the installation, we advise you to perform a backup of your Mac. In case the installation fails or you encounter any issue with the installation, you can roll back to your existing installation.
To create a Backup for your Mac, follow the guide linked below.
STEP 2: Download macOS Ventura
The next step is to download macOS Ventura. Normally, you won't be able to get new updates as you're using an unsupported Mac and Apple will block updates for the new OS. However, there's another workaround available and you can download a copy of macOS Ventura very easily. To download macOS Ventura, follow the guide below

GUIDE - How to Download macOS Ventura on Unsupported Mac
How to Download macOS Ventura on Unsupported Mac An EliteMacx86 Exclusive Guide - This guide covers downloading a copy of macOS Ventura, unofficially. Overview Today, Apple announced their new macOS lineup i.e macOS Ventura 13.0 which is Apple's newest and most awaited OS. Monterey adding...
 elitemacx86.com
STEP 3: Setup OpenCore
The next step is to set up OpenCore which will allow upgrading your Unsupported Mac to macOS Ventura. Typically, involving the preparation of EFI using OCLP.
1. On your target Mac, boot to Desktop.
2. Apple menu > About This Mac>System Report
3. Note down the model identifier. In our case, it's Macmini7,1
4. Download OCLP.
5. Open OCLP and you'll see something similar to the screenshot attached below.
NOTE:
|
6. OCLP detects the Mac model automatically. However, it is still recommended to select the target Mac model identifier from the drop-down selection, especially if you're running OCLP from any other than the target Mac. To select the target Mac model, simply click on con Settings and select the target Mac model identifier from the drop-down selection.
7. If you're using a Mac which is Monterey compatible (natively), select Allow native models checkbox.
8. Click on SMBIOS Settings and you'll see something similar to the screenshot attached below.
9. Select Advanced in SMBIOS Spoof Level and then select the SMBIOS Spoof Model. As I'm using Macmini7,1, it would be best to select Macmini8,1 which is natively supported with macOS Ventura.
NOTES:
|
10. Click on Generate S/N and it will generate a Serial Number. The SMBIOS should be similar to the screenshot attached below.
11. Click on Return Settings and you should have something similar to the screenshot attached below.
12. Click on Return to Main Menu
13. Click on Build and Install OpenCore and then click on Build OpenCore button
14. Once the OpenCore is built, it will prompt you to view the log and install OpenCore to the target disk for booting.
15. Click on Install to disk and you should have something similar to the screenshot attached below.
16. Select the current disk on which an older version of macOS is installed. In our case, it's disk0 - Samsung SSD 860
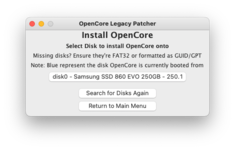
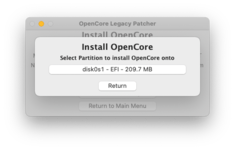
17. From the available FAT32 (ESP) Partition, select the disk to install OpenCore. When prompted, enter your system password
18. Once OCLP finishes installing OpenCore to the target disk, you'll see the following.
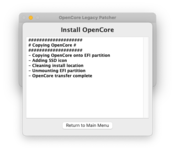
And within a few seconds, it will prompt to reboot.
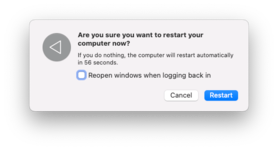
19. Once, you're done with all the above processes, click on Reboot.
20. After clicking on Reboot, you'll see the confirmation dialogue box to restart your Mac. Simply click on Restart to restart your Mac
STEP 4: Boot using OpenCore
Once you're done with STEP #4, you need to boot using the OpenCore. To boot using OpenCore, follow the steps below.
1. Restart your Mac and while restarting, hold down the option key and boot from EFI Boot with the OCLP icon.
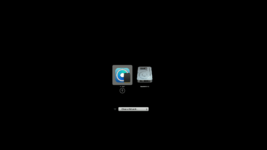
2. When at OC Boot picker, select your system drive (the drive on which you have existing macOS) and press enter to boot and it will boot back to the old macOS.
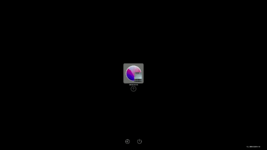
STEP 5: Upgrade to macOS Ventura
After booting using OpenCore, the next step is to upgrade to macOS Ventura. To upgrade your Unsupported Mac to macOS Ventura, follow the steps below.
1. From the Applications folder, right click on Install macOS Ventura beta and click on open
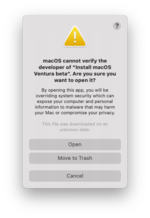
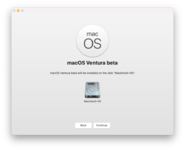
2. Click on Continue and then continue with the options.
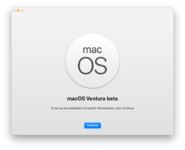
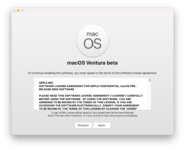 '
'
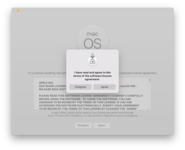
Now, macOS Ventura will begin installing to your selected disk.
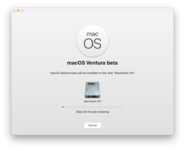
3. Once the first phase completes, the installer will prompt for restarting your Mac and your Mac will restart automatically.
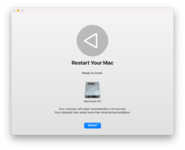
After restarting, it will continue the installation

Your Mac will restart again and when your Mac restarts, it will automatically boot from Macintosh HD to continue the installation.
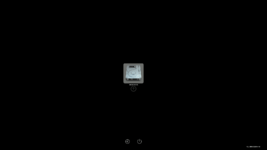
Once again, your Mac will restart and when your Mac restarts, it will automatically boot from Macintosh HD to continue the installation, like above and after it boots, you'll see something like below.
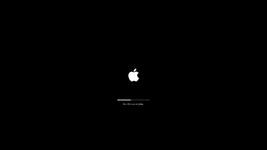
After this process, your Mac will finish installing and you'll be asked to enter your password to login into macOS Ventura.
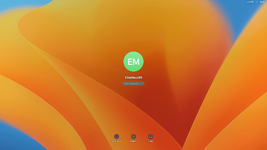
4. Enter your password and you have successfully upgraded to macOS Ventura on your unsupported Mac.
Last edited:
