- Joined
- Jul 22, 2018
- Messages
- 9,292
- Motherboard
- Supermicro X11SPA-T
- CPU
- Intel Xeon W-3275 28 Core
- Graphics
- 2xAMD RX 580 8GB
- OS X/macOS
- 13.x
- Bootloader
- OpenCore (UEFI)
- Mac
- Mac mini
- MacBook Pro
- Mobile Phone
- Android
- iOS
How to Flash Broadcom Bluetooth Firmware
An EliteMacx86 Exclusive Guide - This guide describes how to flash Broadcom Bluetooth Firmware on macOS and is applicable to both, built-in and external USB Adapter. By following this guide, you'll be able to flash the firmware for your Broadcom Bluetooth device and restore it again to a functional state.
Overview
With our previous guide for fixing Bluetooth, there are a few cases where the Bluetooth doesn't seem to work at all, regardless of the OS X/macOS versions. A very similar case was reported by the forum member @HG87. This is because, the Bluetooth Device was in Device Firmware Upgrade (DFU) mode, and as a reason, while WiFi works, the Bluetooth will not function at all. Although, this isn't normal and doesn't usually happen but only in rare cases. This is because the IOBluetoothUSBDFUTool may corrupt the firmware during the macOS upgrade. Other reasons may include some sort of failure or corruption that occurred during the firmware upload.
When in DFU mode, the Bluetooth address will be reported as


Prior to macOS Big Sur, it will report as "No information available" under the Hardware>Bluetooth section in System Report. Similar behavior can be noticed on Windows as well. On the Windows side, it reports "This device cannot start. (Code 10)".
When the Bluetooth Device is reported as Broadcom Bluetooth Download Device, it means the Bluetooth device is either not initialized or in Firmware Flash Mode, waiting to be flashed with firmware. macOS doesn't invoke the FW upgrade on every boot and the BT stays inoperable. In order to fix this we have to upload the FW manually using dfu-util. This tool is based on original Linux dfu-programmer / dfu-util and uses the USB DFU specification to upload firmware into a DFU device. The same functionality is used in /System/Library/Extensions/IOBluetoothFamily.kext/Contents/PlugIns/IOBluetoothUSBDFU.kext/Contents/Resources/IOBluetoothUSBDFUTool. However IOBluetoothUSBDFUTool does not allow loading custom firmware into existing devices and is neither recommended.
Please note that this does not work on Broadcom PatchRAM USB devices. For other devices (such as the original Apple Bluetooth devices) it is able to re-program them.
The steps mentioned below are valid only if your card is in DFU Mode and will not work if your Bluetooth Device is faulty or uses a different protocol such as UART.
Requirements
Following are the requirements for flashing the Broadcom Bluetooth Firmware on macOS. Please ensure you meet the requirements before proceeding with this guide.
Assumptions
This guide assumes that you have already some experience with the following. Having some of the following experience can be really helpful when following the guide.
- macOS/OS X Bootable USB with a properly configured EFI
- Basic config.plist editing skills
- Basic Terminal Usage
- Basic Clover/OpenCore knowledge
- Basic knowledge of installing/injecting kexts
 WARNING:
The following method described below is risky and it may brick your Thunderbolt hardware during this process. The chip may be damaged and you may require a programmer and original firmware to flash the Thunderbolt chip in order to bring your Thunderbolt back to life again. The steps provided here may or may not be accurate or applicable to your particular Thunderbolt hardware. By using this guide, you understand all the risks involved and EliteMacx86 shall not be liable for any of the damages that might occur and takes no responsibility for any of your actions. Please proceed with caution!
STEP1: Installing Homebrew
The very first step is to install Homebrew. If you're not aware of Homebrew and what this amazing package manager is capable of, a guide is already available which is linked below.
Note that this will also install Command Line Tools, if you haven't already.
You'll see something similar to the following as an output of the operation:
STEP2: Installing DFU Tool
Once you have installed Homebrew, the next step is to install the DFU Tool for flashing the firmware. To install DFU Tool, follow the steps below.
1. Assuming the Terminal Window is still opened,
You'll see something similar to the following as an output of the operation:
STEP 3: Backup existing Firmware
The next step is to backup the existing firmware for a latter use (for debugging purposes). To backup the firmware, follow the steps below.
Assuming the Terminal Window is still open, execute the following command'
You'll see something similar to the following as an output of the operation:
In most cases, it will fail to download but this is pretty normal and you don't have to worry about it.
STEP 4: Extracting Firmware
The next step is to extract the firmware for upload. Normally, the firmware is already included with OS X/macOS (.dfu files) and can be found under
STEP 5: Uploading the Firmware
The next step is to upload the firmware to Bluetooth. Yes, this step is what you have been waiting for so long To upload the firmware, follow the steps below.
Assuming the Terminal Window is still open, execute the following commands
The firmware can be uploaded using the command
Where, 20XXX_82XX represents the firmware name. You can find a common firmware list name in the table below.
In our case, the command would be:
You'll see something similar to the following as an output of the operation:
Sometimes, it is likely possible that you'll receive the following error but you don't have to worry about it.
You can ignore the above error to make sure the firmware is flashed correctly, you can try to re-upload the firmware and if the previous flash is successful, you should see something similar to the following:
Note the last line "dfu-util: No DFU capable USB device available". This means the firmware flash was successful and the Bluetooth Device is switched back to normal mode.
Quit Terminal
STEP 6: Restarting System
After performing all the above steps, restart your system for the applied changes to take effect. It is recommended to reset NVRAM twice at least.
Verifying Bluetooth Function
The next step is to verify whether the Bluetooth Device is working or not. Follow the steps below to verify the Bluetooth Function.
System Report


System Preferences

Menubar

Hackintool

IOReg

Credits:
hg87
An EliteMacx86 Exclusive Guide - This guide describes how to flash Broadcom Bluetooth Firmware on macOS and is applicable to both, built-in and external USB Adapter. By following this guide, you'll be able to flash the firmware for your Broadcom Bluetooth device and restore it again to a functional state.
Overview
With our previous guide for fixing Bluetooth, there are a few cases where the Bluetooth doesn't seem to work at all, regardless of the OS X/macOS versions. A very similar case was reported by the forum member @HG87. This is because, the Bluetooth Device was in Device Firmware Upgrade (DFU) mode, and as a reason, while WiFi works, the Bluetooth will not function at all. Although, this isn't normal and doesn't usually happen but only in rare cases. This is because the IOBluetoothUSBDFUTool may corrupt the firmware during the macOS upgrade. Other reasons may include some sort of failure or corruption that occurred during the firmware upload.
When in DFU mode, the Bluetooth address will be reported as
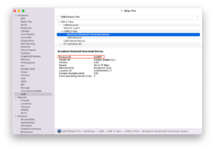
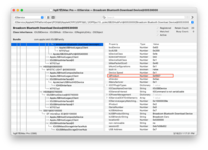
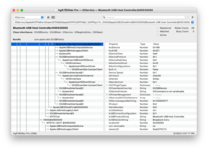
NULL and the Firmware version will be reported as v0 c0 in the Hardware>Bluetooth section. In addition, the Bluetooth Device will appear as Broadcom Bluetooth Download Device and the Product ID will be reported as 0xf007 in the Hardware>USB section under System Report Window. However, when in normal mode (active, functional state), there is a proper Bluetooth address, a firmware number, and a valid Product ID, and is usually seen as Bluetooth USB Host Controller. This can be also checked via IOReg.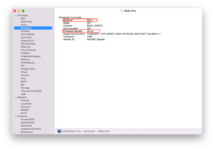
Prior to macOS Big Sur, it will report as "No information available" under the Hardware>Bluetooth section in System Report. Similar behavior can be noticed on Windows as well. On the Windows side, it reports "This device cannot start. (Code 10)".
When the Bluetooth Device is reported as Broadcom Bluetooth Download Device, it means the Bluetooth device is either not initialized or in Firmware Flash Mode, waiting to be flashed with firmware. macOS doesn't invoke the FW upgrade on every boot and the BT stays inoperable. In order to fix this we have to upload the FW manually using dfu-util. This tool is based on original Linux dfu-programmer / dfu-util and uses the USB DFU specification to upload firmware into a DFU device. The same functionality is used in /System/Library/Extensions/IOBluetoothFamily.kext/Contents/PlugIns/IOBluetoothUSBDFU.kext/Contents/Resources/IOBluetoothUSBDFUTool. However IOBluetoothUSBDFUTool does not allow loading custom firmware into existing devices and is neither recommended.
Please note that this does not work on Broadcom PatchRAM USB devices. For other devices (such as the original Apple Bluetooth devices) it is able to re-program them.
The steps mentioned below are valid only if your card is in DFU Mode and will not work if your Bluetooth Device is faulty or uses a different protocol such as UART.
Requirements
Following are the requirements for flashing the Broadcom Bluetooth Firmware on macOS. Please ensure you meet the requirements before proceeding with this guide.
| Bluetooth |
|
| macOS |
|
| Bootloader |
|
| Kexts |
|
Assumptions
This guide assumes that you have already some experience with the following. Having some of the following experience can be really helpful when following the guide.
- macOS/OS X Bootable USB with a properly configured EFI
- Basic config.plist editing skills
- Basic Terminal Usage
- Basic Clover/OpenCore knowledge
- Basic knowledge of installing/injecting kexts
Flashing Firmware
The following method described below is risky and it may brick your Thunderbolt hardware during this process. The chip may be damaged and you may require a programmer and original firmware to flash the Thunderbolt chip in order to bring your Thunderbolt back to life again. The steps provided here may or may not be accurate or applicable to your particular Thunderbolt hardware. By using this guide, you understand all the risks involved and EliteMacx86 shall not be liable for any of the damages that might occur and takes no responsibility for any of your actions. Please proceed with caution!
STEP1: Installing Homebrew
The very first step is to install Homebrew. If you're not aware of Homebrew and what this amazing package manager is capable of, a guide is already available which is linked below.
Note that this will also install Command Line Tools, if you haven't already.
You'll see something similar to the following as an output of the operation:
Bash:
/bin/bash -c "$(curl -fsSL https://raw.githubusercontent.com/Homebrew/install/HEAD/install.sh)"
==> Checking for `sudo` access (which may request your password)...
Password:
==> This script will install:
/usr/local/bin/brew
/usr/local/share/doc/homebrew
/usr/local/share/man/man1/brew.1
/usr/local/share/zsh/site-functions/_brew
/usr/local/etc/bash_completion.d/brew
/usr/local/Homebrew
==> The following new directories will be created:
/usr/local/bin
/usr/local/etc
/usr/local/include
/usr/local/lib
/usr/local/sbin
/usr/local/share
/usr/local/var
/usr/local/opt
/usr/local/share/zsh
/usr/local/share/zsh/site-functions
/usr/local/var/homebrew
/usr/local/var/homebrew/linked
/usr/local/Cellar
/usr/local/Caskroom
/usr/local/Frameworks
==> The Xcode Command Line Tools will be installed.
Press RETURN/ENTER to continue or any other key to abort:
==> /usr/bin/sudo /bin/mkdir -p /usr/local/bin /usr/local/etc /usr/local/include /usr/local/lib /usr/local/sbin /usr/local/share /usr/local/var /usr/local/opt /usr/local/share/zsh /usr/local/share/zsh/site-functions /usr/local/var/homebrew /usr/local/var/homebrew/linked /usr/local/Cellar /usr/local/Caskroom /usr/local/Frameworks
==> /usr/bin/sudo /bin/chmod ug=rwx /usr/local/bin /usr/local/etc /usr/local/include /usr/local/lib /usr/local/sbin /usr/local/share /usr/local/var /usr/local/opt /usr/local/share/zsh /usr/local/share/zsh/site-functions /usr/local/var/homebrew /usr/local/var/homebrew/linked /usr/local/Cellar /usr/local/Caskroom /usr/local/Frameworks
==> /usr/bin/sudo /bin/chmod go-w /usr/local/share/zsh /usr/local/share/zsh/site-functions
==> /usr/bin/sudo /usr/sbin/chown increase /usr/local/bin /usr/local/etc /usr/local/include /usr/local/lib /usr/local/sbin /usr/local/share /usr/local/var /usr/local/opt /usr/local/share/zsh /usr/local/share/zsh/site-functions /usr/local/var/homebrew /usr/local/var/homebrew/linked /usr/local/Cellar /usr/local/Caskroom /usr/local/Frameworks
==> /usr/bin/sudo /usr/bin/chgrp admin /usr/local/bin /usr/local/etc /usr/local/include /usr/local/lib /usr/local/sbin /usr/local/share /usr/local/var /usr/local/opt /usr/local/share/zsh /usr/local/share/zsh/site-functions /usr/local/var/homebrew /usr/local/var/homebrew/linked /usr/local/Cellar /usr/local/Caskroom /usr/local/Frameworks
==> /usr/bin/sudo /bin/mkdir -p /usr/local/Homebrew
==> /usr/bin/sudo /usr/sbin/chown -R increase:admin /usr/local/Homebrew
==> /usr/bin/sudo /bin/mkdir -p /Users/increase/Library/Caches/Homebrew
==> /usr/bin/sudo /bin/chmod g+rwx /Users/increase/Library/Caches/Homebrew
==> /usr/bin/sudo /usr/sbin/chown -R increase /Users/increase/Library/Caches/Homebrew
==> Searching online for the Command Line Tools
==> /usr/bin/sudo /usr/bin/touch /tmp/.com.apple.dt.CommandLineTools.installondemand.in-progress
==> Installing Command Line Tools for Xcode-14.2
==> /usr/bin/sudo /usr/sbin/softwareupdate -i Command\ Line\ Tools\ for\ Xcode-14.2
Software Update Tool
Finding available software
Downloading Command Line Tools for Xcode
Downloaded Command Line Tools for Xcode
Installing Command Line Tools for Xcode
Done with Command Line Tools for Xcode
Done.
==> /usr/bin/sudo /usr/bin/xcode-select --switch /Library/Developer/CommandLineTools
Password:
==> /usr/bin/sudo /bin/rm -f /tmp/.com.apple.dt.CommandLineTools.installondemand.in-progress
==> Downloading and installing Homebrew...
remote: Enumerating objects: 233046, done.
remote: Counting objects: 100% (376/376), done.
remote: Compressing objects: 100% (255/255), done.
remote: Total 233046 (delta 144), reused 304 (delta 118), pack-reused 232670
Receiving objects: 100% (233046/233046), 67.15 MiB | 3.41 MiB/s, done.
Resolving deltas: 100% (171051/171051), done.
From https://github.com/Homebrew/brew
* [new branch] master -> origin/master
* [new tag] 0.1 -> 0.1
* [new tag] 0.2 -> 0.2
* [new tag] 0.3 -> 0.3
* [new tag] 0.4 -> 0.4
* [new tag] 0.5 -> 0.5
* [new tag] 0.6 -> 0.6
* [new tag] 0.7 -> 0.7
* [new tag] 0.7.1 -> 0.7.1
* [new tag] 0.8 -> 0.8
* [new tag] 0.8.1 -> 0.8.1
* [new tag] 0.9 -> 0.9
* [new tag] 0.9.1 -> 0.9.1
* [new tag] 0.9.2 -> 0.9.2
* [new tag] 0.9.3 -> 0.9.3
* [new tag] 0.9.4 -> 0.9.4
* [new tag] 0.9.5 -> 0.9.5
* [new tag] 0.9.8 -> 0.9.8
* [new tag] 0.9.9 -> 0.9.9
* [new tag] 1.0.0 -> 1.0.0
* [new tag] 1.0.1 -> 1.0.1
* [new tag] 1.0.2 -> 1.0.2
* [new tag] 1.0.3 -> 1.0.3
* [new tag] 1.0.4 -> 1.0.4
* [new tag] 1.0.5 -> 1.0.5
* [new tag] 1.0.6 -> 1.0.6
* [new tag] 1.0.7 -> 1.0.7
* [new tag] 1.0.8 -> 1.0.8
* [new tag] 1.0.9 -> 1.0.9
* [new tag] 1.1.0 -> 1.1.0
* [new tag] 1.1.1 -> 1.1.1
* [new tag] 1.1.10 -> 1.1.10
* [new tag] 1.1.11 -> 1.1.11
* [new tag] 1.1.12 -> 1.1.12
* [new tag] 1.1.13 -> 1.1.13
* [new tag] 1.1.2 -> 1.1.2
* [new tag] 1.1.3 -> 1.1.3
* [new tag] 1.1.4 -> 1.1.4
* [new tag] 1.1.5 -> 1.1.5
* [new tag] 1.1.6 -> 1.1.6
* [new tag] 1.1.7 -> 1.1.7
* [new tag] 1.1.8 -> 1.1.8
* [new tag] 1.1.9 -> 1.1.9
* [new tag] 1.2.0 -> 1.2.0
* [new tag] 1.2.1 -> 1.2.1
* [new tag] 1.2.2 -> 1.2.2
* [new tag] 1.2.3 -> 1.2.3
* [new tag] 1.2.4 -> 1.2.4
* [new tag] 1.2.5 -> 1.2.5
* [new tag] 1.2.6 -> 1.2.6
* [new tag] 1.3.0 -> 1.3.0
* [new tag] 1.3.1 -> 1.3.1
* [new tag] 1.3.2 -> 1.3.2
* [new tag] 1.3.3 -> 1.3.3
* [new tag] 1.3.4 -> 1.3.4
* [new tag] 1.3.5 -> 1.3.5
* [new tag] 1.3.6 -> 1.3.6
* [new tag] 1.3.7 -> 1.3.7
* [new tag] 1.3.8 -> 1.3.8
* [new tag] 1.3.9 -> 1.3.9
* [new tag] 1.4.0 -> 1.4.0
* [new tag] 1.4.1 -> 1.4.1
* [new tag] 1.4.2 -> 1.4.2
* [new tag] 1.4.3 -> 1.4.3
* [new tag] 1.5.0 -> 1.5.0
* [new tag] 1.5.1 -> 1.5.1
* [new tag] 1.5.10 -> 1.5.10
* [new tag] 1.5.11 -> 1.5.11
* [new tag] 1.5.12 -> 1.5.12
* [new tag] 1.5.13 -> 1.5.13
* [new tag] 1.5.14 -> 1.5.14
* [new tag] 1.5.2 -> 1.5.2
* [new tag] 1.5.3 -> 1.5.3
* [new tag] 1.5.4 -> 1.5.4
* [new tag] 1.5.5 -> 1.5.5
* [new tag] 1.5.6 -> 1.5.6
* [new tag] 1.5.7 -> 1.5.7
* [new tag] 1.5.8 -> 1.5.8
* [new tag] 1.5.9 -> 1.5.9
* [new tag] 1.6.0 -> 1.6.0
* [new tag] 1.6.1 -> 1.6.1
* [new tag] 1.6.10 -> 1.6.10
* [new tag] 1.6.11 -> 1.6.11
* [new tag] 1.6.12 -> 1.6.12
* [new tag] 1.6.13 -> 1.6.13
* [new tag] 1.6.14 -> 1.6.14
* [new tag] 1.6.15 -> 1.6.15
* [new tag] 1.6.16 -> 1.6.16
* [new tag] 1.6.17 -> 1.6.17
* [new tag] 1.6.2 -> 1.6.2
* [new tag] 1.6.3 -> 1.6.3
* [new tag] 1.6.4 -> 1.6.4
* [new tag] 1.6.5 -> 1.6.5
* [new tag] 1.6.6 -> 1.6.6
* [new tag] 1.6.7 -> 1.6.7
* [new tag] 1.6.8 -> 1.6.8
* [new tag] 1.6.9 -> 1.6.9
* [new tag] 1.7.0 -> 1.7.0
* [new tag] 1.7.1 -> 1.7.1
* [new tag] 1.7.2 -> 1.7.2
* [new tag] 1.7.3 -> 1.7.3
* [new tag] 1.7.4 -> 1.7.4
* [new tag] 1.7.5 -> 1.7.5
* [new tag] 1.7.6 -> 1.7.6
* [new tag] 1.7.7 -> 1.7.7
* [new tag] 1.8.0 -> 1.8.0
* [new tag] 1.8.1 -> 1.8.1
* [new tag] 1.8.2 -> 1.8.2
* [new tag] 1.8.3 -> 1.8.3
* [new tag] 1.8.4 -> 1.8.4
* [new tag] 1.8.5 -> 1.8.5
* [new tag] 1.8.6 -> 1.8.6
* [new tag] 1.9.0 -> 1.9.0
* [new tag] 1.9.1 -> 1.9.1
* [new tag] 1.9.2 -> 1.9.2
* [new tag] 1.9.3 -> 1.9.3
* [new tag] 2.0.0 -> 2.0.0
* [new tag] 2.0.1 -> 2.0.1
* [new tag] 2.0.2 -> 2.0.2
* [new tag] 2.0.3 -> 2.0.3
* [new tag] 2.0.4 -> 2.0.4
* [new tag] 2.0.5 -> 2.0.5
* [new tag] 2.0.6 -> 2.0.6
* [new tag] 2.1.0 -> 2.1.0
* [new tag] 2.1.1 -> 2.1.1
* [new tag] 2.1.10 -> 2.1.10
* [new tag] 2.1.11 -> 2.1.11
* [new tag] 2.1.12 -> 2.1.12
* [new tag] 2.1.13 -> 2.1.13
* [new tag] 2.1.14 -> 2.1.14
* [new tag] 2.1.15 -> 2.1.15
* [new tag] 2.1.16 -> 2.1.16
* [new tag] 2.1.2 -> 2.1.2
* [new tag] 2.1.3 -> 2.1.3
* [new tag] 2.1.4 -> 2.1.4
* [new tag] 2.1.5 -> 2.1.5
* [new tag] 2.1.6 -> 2.1.6
* [new tag] 2.1.7 -> 2.1.7
* [new tag] 2.1.8 -> 2.1.8
* [new tag] 2.1.9 -> 2.1.9
* [new tag] 2.2.0 -> 2.2.0
* [new tag] 2.2.1 -> 2.2.1
* [new tag] 2.2.10 -> 2.2.10
* [new tag] 2.2.11 -> 2.2.11
* [new tag] 2.2.12 -> 2.2.12
* [new tag] 2.2.13 -> 2.2.13
* [new tag] 2.2.14 -> 2.2.14
* [new tag] 2.2.15 -> 2.2.15
* [new tag] 2.2.16 -> 2.2.16
* [new tag] 2.2.17 -> 2.2.17
* [new tag] 2.2.2 -> 2.2.2
* [new tag] 2.2.3 -> 2.2.3
* [new tag] 2.2.4 -> 2.2.4
* [new tag] 2.2.5 -> 2.2.5
* [new tag] 2.2.6 -> 2.2.6
* [new tag] 2.2.7 -> 2.2.7
* [new tag] 2.2.8 -> 2.2.8
* [new tag] 2.2.9 -> 2.2.9
* [new tag] 2.3.0 -> 2.3.0
* [new tag] 2.4.0 -> 2.4.0
* [new tag] 2.4.1 -> 2.4.1
* [new tag] 2.4.10 -> 2.4.10
* [new tag] 2.4.11 -> 2.4.11
* [new tag] 2.4.12 -> 2.4.12
* [new tag] 2.4.13 -> 2.4.13
* [new tag] 2.4.14 -> 2.4.14
* [new tag] 2.4.15 -> 2.4.15
* [new tag] 2.4.16 -> 2.4.16
* [new tag] 2.4.2 -> 2.4.2
* [new tag] 2.4.3 -> 2.4.3
* [new tag] 2.4.4 -> 2.4.4
* [new tag] 2.4.5 -> 2.4.5
* [new tag] 2.4.6 -> 2.4.6
* [new tag] 2.4.7 -> 2.4.7
* [new tag] 2.4.8 -> 2.4.8
* [new tag] 2.4.9 -> 2.4.9
* [new tag] 2.5.0 -> 2.5.0
* [new tag] 2.5.1 -> 2.5.1
* [new tag] 2.5.10 -> 2.5.10
* [new tag] 2.5.11 -> 2.5.11
* [new tag] 2.5.12 -> 2.5.12
* [new tag] 2.5.2 -> 2.5.2
* [new tag] 2.5.3 -> 2.5.3
* [new tag] 2.5.4 -> 2.5.4
* [new tag] 2.5.5 -> 2.5.5
* [new tag] 2.5.6 -> 2.5.6
* [new tag] 2.5.7 -> 2.5.7
* [new tag] 2.5.8 -> 2.5.8
* [new tag] 2.5.9 -> 2.5.9
* [new tag] 2.6.0 -> 2.6.0
* [new tag] 2.6.1 -> 2.6.1
* [new tag] 2.6.2 -> 2.6.2
* [new tag] 2.7.0 -> 2.7.0
* [new tag] 2.7.1 -> 2.7.1
* [new tag] 2.7.2 -> 2.7.2
* [new tag] 2.7.3 -> 2.7.3
* [new tag] 2.7.4 -> 2.7.4
* [new tag] 2.7.5 -> 2.7.5
* [new tag] 2.7.6 -> 2.7.6
* [new tag] 2.7.7 -> 2.7.7
* [new tag] 3.0.0 -> 3.0.0
* [new tag] 3.0.1 -> 3.0.1
* [new tag] 3.0.10 -> 3.0.10
* [new tag] 3.0.11 -> 3.0.11
* [new tag] 3.0.2 -> 3.0.2
* [new tag] 3.0.3 -> 3.0.3
* [new tag] 3.0.4 -> 3.0.4
* [new tag] 3.0.5 -> 3.0.5
* [new tag] 3.0.6 -> 3.0.6
* [new tag] 3.0.7 -> 3.0.7
* [new tag] 3.0.8 -> 3.0.8
* [new tag] 3.0.9 -> 3.0.9
* [new tag] 3.1.0 -> 3.1.0
* [new tag] 3.1.1 -> 3.1.1
* [new tag] 3.1.10 -> 3.1.10
* [new tag] 3.1.11 -> 3.1.11
* [new tag] 3.1.12 -> 3.1.12
* [new tag] 3.1.2 -> 3.1.2
* [new tag] 3.1.3 -> 3.1.3
* [new tag] 3.1.4 -> 3.1.4
* [new tag] 3.1.5 -> 3.1.5
* [new tag] 3.1.6 -> 3.1.6
* [new tag] 3.1.7 -> 3.1.7
* [new tag] 3.1.8 -> 3.1.8
* [new tag] 3.1.9 -> 3.1.9
* [new tag] 3.2.0 -> 3.2.0
* [new tag] 3.2.1 -> 3.2.1
* [new tag] 3.2.10 -> 3.2.10
* [new tag] 3.2.11 -> 3.2.11
* [new tag] 3.2.12 -> 3.2.12
* [new tag] 3.2.13 -> 3.2.13
* [new tag] 3.2.14 -> 3.2.14
* [new tag] 3.2.15 -> 3.2.15
* [new tag] 3.2.16 -> 3.2.16
* [new tag] 3.2.17 -> 3.2.17
* [new tag] 3.2.2 -> 3.2.2
* [new tag] 3.2.3 -> 3.2.3
* [new tag] 3.2.4 -> 3.2.4
* [new tag] 3.2.5 -> 3.2.5
* [new tag] 3.2.6 -> 3.2.6
* [new tag] 3.2.7 -> 3.2.7
* [new tag] 3.2.8 -> 3.2.8
* [new tag] 3.2.9 -> 3.2.9
* [new tag] 3.3.0 -> 3.3.0
* [new tag] 3.3.1 -> 3.3.1
* [new tag] 3.3.10 -> 3.3.10
* [new tag] 3.3.11 -> 3.3.11
* [new tag] 3.3.12 -> 3.3.12
* [new tag] 3.3.13 -> 3.3.13
* [new tag] 3.3.14 -> 3.3.14
* [new tag] 3.3.15 -> 3.3.15
* [new tag] 3.3.16 -> 3.3.16
* [new tag] 3.3.2 -> 3.3.2
* [new tag] 3.3.3 -> 3.3.3
* [new tag] 3.3.4 -> 3.3.4
* [new tag] 3.3.5 -> 3.3.5
* [new tag] 3.3.6 -> 3.3.6
* [new tag] 3.3.7 -> 3.3.7
* [new tag] 3.3.8 -> 3.3.8
* [new tag] 3.3.9 -> 3.3.9
* [new tag] 3.4.0 -> 3.4.0
* [new tag] 3.4.1 -> 3.4.1
* [new tag] 3.4.10 -> 3.4.10
* [new tag] 3.4.11 -> 3.4.11
* [new tag] 3.4.2 -> 3.4.2
* [new tag] 3.4.3 -> 3.4.3
* [new tag] 3.4.4 -> 3.4.4
* [new tag] 3.4.5 -> 3.4.5
* [new tag] 3.4.6 -> 3.4.6
* [new tag] 3.4.7 -> 3.4.7
* [new tag] 3.4.8 -> 3.4.8
* [new tag] 3.4.9 -> 3.4.9
* [new tag] 3.5.0 -> 3.5.0
* [new tag] 3.5.1 -> 3.5.1
* [new tag] 3.5.10 -> 3.5.10
* [new tag] 3.5.2 -> 3.5.2
* [new tag] 3.5.3 -> 3.5.3
* [new tag] 3.5.4 -> 3.5.4
* [new tag] 3.5.5 -> 3.5.5
* [new tag] 3.5.6 -> 3.5.6
* [new tag] 3.5.7 -> 3.5.7
* [new tag] 3.5.8 -> 3.5.8
* [new tag] 3.5.9 -> 3.5.9
* [new tag] 3.6.0 -> 3.6.0
* [new tag] 3.6.1 -> 3.6.1
* [new tag] 3.6.10 -> 3.6.10
* [new tag] 3.6.11 -> 3.6.11
* [new tag] 3.6.12 -> 3.6.12
* [new tag] 3.6.13 -> 3.6.13
* [new tag] 3.6.14 -> 3.6.14
* [new tag] 3.6.15 -> 3.6.15
* [new tag] 3.6.16 -> 3.6.16
* [new tag] 3.6.17 -> 3.6.17
* [new tag] 3.6.18 -> 3.6.18
* [new tag] 3.6.19 -> 3.6.19
* [new tag] 3.6.2 -> 3.6.2
* [new tag] 3.6.20 -> 3.6.20
* [new tag] 3.6.21 -> 3.6.21
* [new tag] 3.6.3 -> 3.6.3
* [new tag] 3.6.4 -> 3.6.4
* [new tag] 3.6.5 -> 3.6.5
* [new tag] 3.6.6 -> 3.6.6
* [new tag] 3.6.7 -> 3.6.7
* [new tag] 3.6.8 -> 3.6.8
* [new tag] 3.6.9 -> 3.6.9
* [new tag] 4.0.0 -> 4.0.0
* [new tag] 4.0.1 -> 4.0.1
* [new tag] 4.0.2 -> 4.0.2
* [new tag] 4.0.3 -> 4.0.3
* [new tag] 4.0.4 -> 4.0.4
* [new tag] 4.0.5 -> 4.0.5
* [new tag] 4.0.6 -> 4.0.6
* [new tag] 4.0.7 -> 4.0.7
HEAD is now at bd8341d42 Merge pull request #15020 from dtrodrigues/pluralize-includecount
==> Installation successful!
==> Homebrew has enabled anonymous aggregate formulae and cask analytics.
Read the analytics documentation (and how to opt-out) here:
https://docs.brew.sh/Analytics
No analytics data has been sent yet (nor will any be during this install run).
==> Homebrew is run entirely by unpaid volunteers. Please consider donating:
https://github.com/Homebrew/brew#donations
==> Next steps:
- Run these two commands in your terminal to add Homebrew to your PATH:
(echo; echo 'eval "$(/usr/local/bin/brew shellenv)"') >> /Users/increase/.zprofile
eval "$(/usr/local/bin/brew shellenv)"
- Run brew help to get started
- Further documentation:
https://docs.brew.shSTEP2: Installing DFU Tool
Once you have installed Homebrew, the next step is to install the DFU Tool for flashing the firmware. To install DFU Tool, follow the steps below.
1. Assuming the Terminal Window is still opened,
Bash:
brew install dfu-utilYou'll see something similar to the following as an output of the operation:
Bash:
brew install dfu-util
==> Fetching dependencies for dfu-util: libusb
==> Fetching libusb
==> Downloading https://ghcr.io/v2/homebrew/core/libusb/manifests/1.0.26
######################################################################## 100.0%
==> Downloading https://ghcr.io/v2/homebrew/core/libusb/blobs/sha256:e79be7d4c61
==> Downloading from https://pkg-containers.githubusercontent.com/ghcr1/blobs/sh
######################################################################## 100.0%
==> Fetching dfu-util
==> Downloading https://ghcr.io/v2/homebrew/core/dfu-util/manifests/0.11
######################################################################## 100.0%
==> Downloading https://ghcr.io/v2/homebrew/core/dfu-util/blobs/sha256:5daf11ce5
==> Downloading from https://pkg-containers.githubusercontent.com/ghcr1/blobs/sh
######################################################################## 100.0%
==> Installing dependencies for dfu-util: libusb
==> Installing dfu-util dependency: libusb
==> Pouring libusb--1.0.26.monterey.bottle.tar.gz
🍺  /usr/local/Cellar/libusb/1.0.26: 22 files, 531.7KB
==> Installing dfu-util
==> Pouring dfu-util--0.11.monterey.bottle.tar.gz
🍺  /usr/local/Cellar/dfu-util/0.11: 13 files, 230.8KB
==> Running `brew cleanup dfu-util`...
Disable this behaviour by setting HOMEBREW_NO_INSTALL_CLEANUP.
Hide these hints with HOMEBREW_NO_ENV_HINTS (see `man brew`).
STEP 3: Backup existing Firmware
The next step is to backup the existing firmware for a latter use (for debugging purposes). To backup the firmware, follow the steps below.
Assuming the Terminal Window is still open, execute the following command'
Bash:
sudo dfu-util -R -U backup.dfuYou'll see something similar to the following as an output of the operation:
Bash:
sudo dfu-util -R -U backup.dfu
Password:
dfu-util 0.11

Copyright 2005-2009 Weston Schmidt, Harald Welte and OpenMoko Inc.
Copyright 2010-2021 Tormod Volden and Stefan Schmidt
This program is Free Software and has ABSOLUTELY NO WARRANTY
Please report bugs to http://sourceforge.net/p/dfu-util/tickets/

Opening DFU capable USB device...
Device ID 05ac:f007
Device DFU version 0110
Claiming USB DFU Interface...
Setting Alternate Interface #0 ...
Determining device status...
DFU state(2) = dfuIDLE, status(0) = No error condition is present
DFU mode device DFU version 0110
Device returned transfer size 64
Copying data from DFU device to PC
Upload    [                         ]   0%            0 bytesdfu-util:
Error during upload (LIBUSB_ERROR_PIPE)


Failed.
In most cases, it will fail to download but this is pretty normal and you don't have to worry about it.
STEP 4: Extracting Firmware
The next step is to extract the firmware for upload. Normally, the firmware is already included with OS X/macOS (.dfu files) and can be found under
/System/Library/Extensions/IOBluetoothFamily.kext/Contents/PlugIns/IOBluetoothUSBDFU.kext/Contents/Resources/. However, since Monterey, Apple removed the IOBluetoothUSBDFU.kext and this kext no longer exist on Monterey and later. Therefore, you must extract the firmware before uploading. Users who are using Big Sur or prior can simply skip to STEP #5.STEP 5: Uploading the Firmware
The next step is to upload the firmware to Bluetooth. Yes, this step is what you have been waiting for so long
Assuming the Terminal Window is still open, execute the following commands
The firmware can be uploaded using the command
Bash:
sudo dfu-util -R -D /System/Library/Extensions/IOBluetoothFamily.kext/Contents/PlugIns/IOBluetoothUSBDFU.kext/Contents/Resources/20XXX_82XX.dfuWhere, 20XXX_82XX represents the firmware name. You can find a common firmware list name in the table below.
In our case, the command would be:
Bash:
sudo dfu-util -R -D /System/Library/Extensions/IOBluetoothFamily.kext/Contents/PlugIns/IOBluetoothUSBDFU.kext/Contents/Resources/20703_8290.dfuYou'll see something similar to the following as an output of the operation:
Bash:
sudo dfu-util -R -D /Users/hg87/Desktop/IOBluetoothUSBDFU.kext/Contents/Resources/20703_8290.dfu
dfu-util 0.11

Copyright 2005-2009 Weston Schmidt, Harald Welte and OpenMoko Inc.
Copyright 2010-2021 Tormod Volden and Stefan Schmidt
This program is Free Software and has ABSOLUTELY NO WARRANTY
Please report bugs to http://sourceforge.net/p/dfu-util/tickets/

Match vendor ID from file: 05ac
Match product ID from file: 8290
Opening DFU capable USB device...
Device ID 05ac:f007
Device DFU version 0110
Claiming USB DFU Interface...
Setting Alternate Interface #0 ...
Determining device status...
DFU state(10) = dfuERROR, status(15) = Device stalled an unexpected request
Clearing status
Determining device status...
DFU state(2) = dfuIDLE, status(0) = No error condition is present
DFU mode device DFU version 0110
Device returned transfer size 64
Copying data from PC to DFU device
Download    [=========================] 100%       103209 bytes
Download done.
DFU state(2) = dfuIDLE, status(0) = No error condition is present
Done!
Resetting USB to switch back to Run-Time mode
[FONT=-apple-system]
Sometimes, it is likely possible that you'll receive the following error but you don't have to worry about it.
Code:
dfu-util: error resetting after download: LIBUSB_ERROR_TIMEOUTYou can ignore the above error to make sure the firmware is flashed correctly, you can try to re-upload the firmware and if the previous flash is successful, you should see something similar to the following:
Bash:
sudo dfu-util -R -D /Users/hg87/Desktop/IOBluetoothUSBDFU.kext/Contents/Resources/20703_8290.dfu
Password:
dfu-util 0.11

Copyright 2005-2009 Weston Schmidt, Harald Welte and OpenMoko Inc.
Copyright 2010-2021 Tormod Volden and Stefan Schmidt
This program is Free Software and has ABSOLUTELY NO WARRANTY
Please report bugs to http://sourceforge.net/p/dfu-util/tickets/

Match vendor ID from file: 05ac
Match product ID from file: 8290
dfu-util: No DFU capable USB device available
Note the last line "dfu-util: No DFU capable USB device available". This means the firmware flash was successful and the Bluetooth Device is switched back to normal mode.
Quit Terminal
| Vendor | Model | Product ID | Firmware |
|---|---|---|---|
| Broadcom | 2046_820F.dfu | ||
| Broadcom | 2046_8210.dfu | ||
| Broadcom | 2046_8213.dfu | ||
| Broadcom | 2046_8215.dfu | ||
| Broadcom | 2046_8216.dfu | ||
| Broadcom | 2046_8217.dfu | ||
| Broadcom | 2070_821A.dfu | ||
| Broadcom | 2070_821B.dfu | ||
| Broadcom | 2070_8218.dfu | ||
| Broadcom | 20702_821D.dfu | ||
| Broadcom | 20702_821F.dfu | ||
| Broadcom | 0x828A | 20702_828A.dfu | |
| Broadcom | BCM94331CD (WTXUP) | 0x828B | 20702_828B.dfu |
| Broadcom | BCM94331CSAX | 0x828C | 20702_828C.dfu |
| Broadcom | BCM94360NG | 0x828D | 20702_828D.dfu |
| Broadcom | BCM94360CS2 (Fenvi FV-HB1200) | 0x828F | 20702_828F.dfu |
| Broadcom | 0x8281 | 20702_8281.dfu | |
| Broadcom | 0x8286 | 20702_8286.dfu | |
| Broadcom | 0x8289 | 20702_8289.dfu | |
| Broadcom | BCM943602CS (Fenvi FV-T919) | 0x8290 | 20703_8290.dfu |
| Broadcom | 0x8294 | 20703_8294.dfu | |
| Broadcom | BCM943602CDP | 0x8296 | 20703_8296.dfu |
STEP 6: Restarting System
After performing all the above steps, restart your system for the applied changes to take effect. It is recommended to reset NVRAM twice at least.
Verifying Bluetooth Function
The next step is to verify whether the Bluetooth Device is working or not. Follow the steps below to verify the Bluetooth Function.
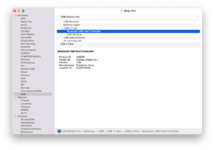
System Report
- Verify the Bluetooth details (Address, Firmware Version) in About This Mac>System Report>Bluetooth
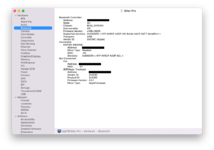
- Verify the Bluetooth Controller Mode and Product ID in About This Mac>System Report>USB
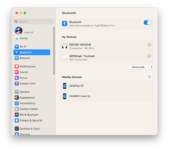
System Preferences
- Verify Bluetooth discoverability in System Preferences>Bluetooth
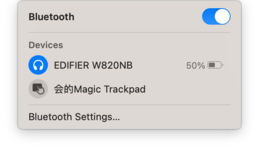
Menubar
- Verify connected Bluetooth Devices
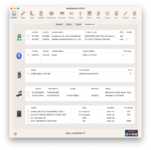
Hackintool
- Verify Firmware Loading in Hackintool>System>Peripherals
IOReg
- Verify Bluetooth Controller and Product ID in IOReg
Credits:
hg87
Last edited:
